How Suite It Is.

This may be the longest house tour I have ever given. Hope you’re not tired of us yet, we still have a lot to show you.

Side note before I begin: I am probably the world’s worst blogger, but hey I am now almost 38 weeks pregnant, who up until recently had a pretty long list of things to accomplish before baby, and the good news is, its not finished. But it is almost.. so hey, I call that progress.

Now back to the tour.

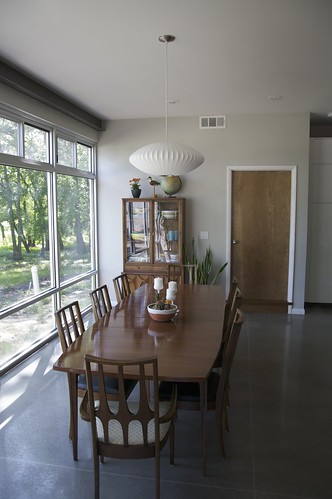
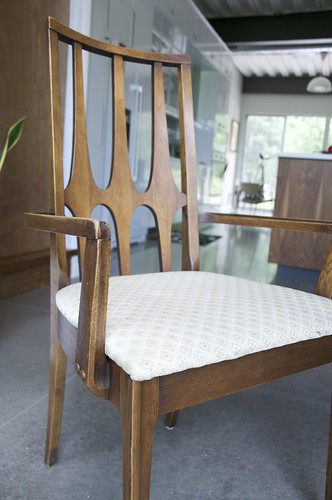
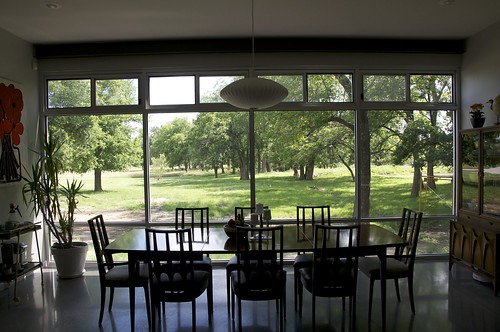
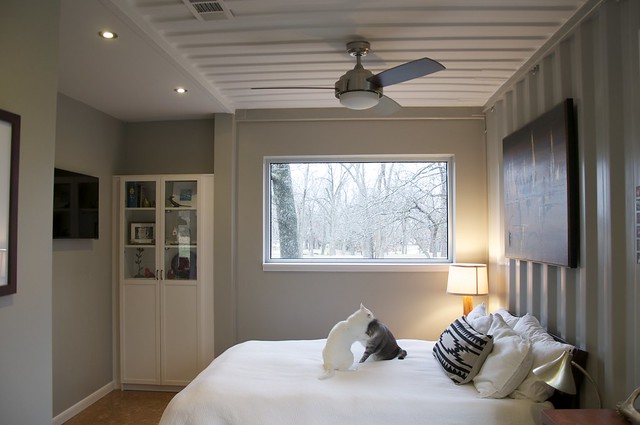
Right off the dining room is our master suite. Our bedroom/closet/bathroom take up one length of a 40ft container.

_DSC5966

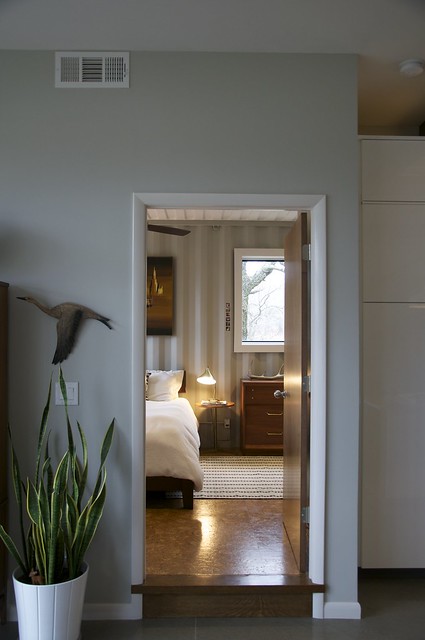
Our master is on the smaller size, but that’s the way we wanted it. It functions and contains everything we need it to.

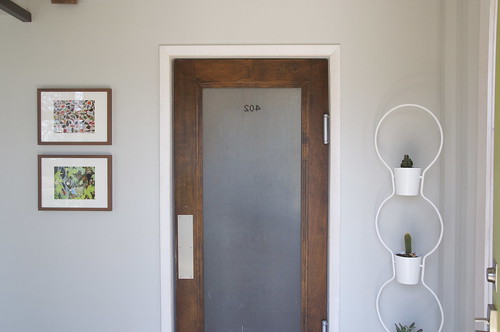
Here is what you see when you enter off the dining room.

_DSC5922 _DSC5920

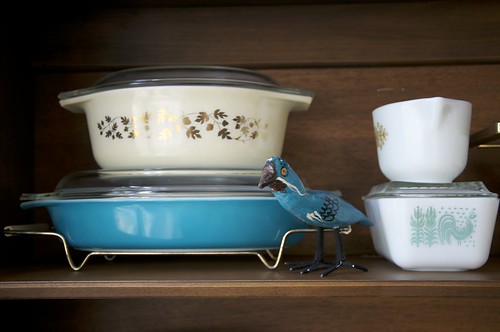
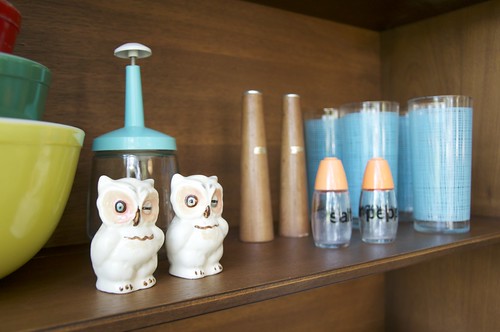
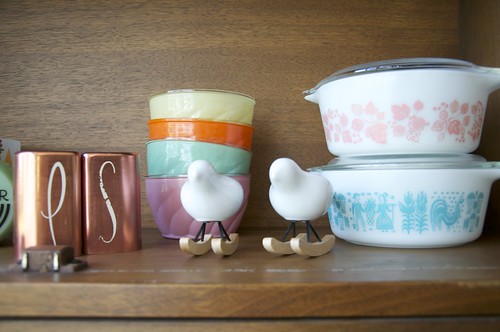
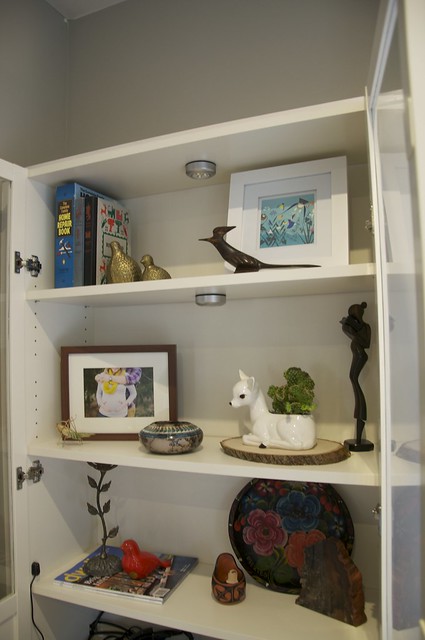
Now, If you look to the left with me, you will see a tv mounted on the wall and a display cabinet, which we use to hide all our tv components, dvds, games, etc, and display some pretties. This cabinet displays a lot of things we picked up on our recent 4,500 mile road trip to and from California, and some items from my mother in law, which are from Cuba.
_DSC5915

_DSC5913

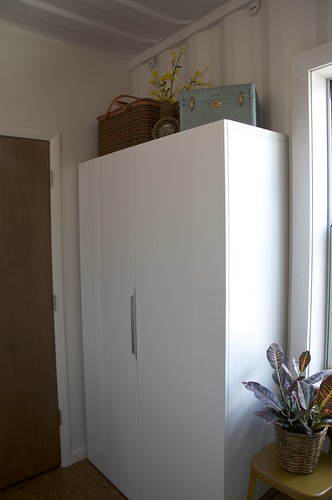
Now looking the other direction towards our closet _DSC5924

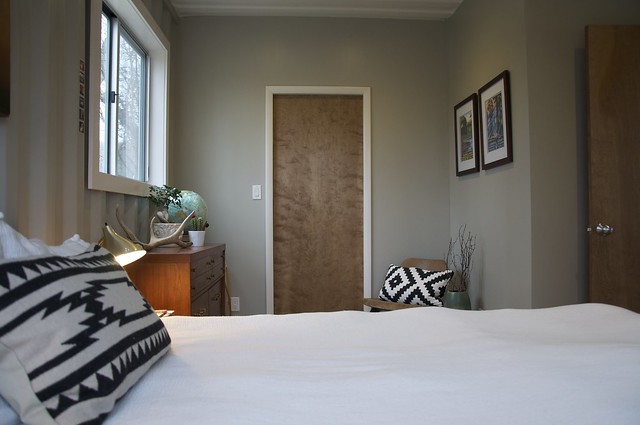
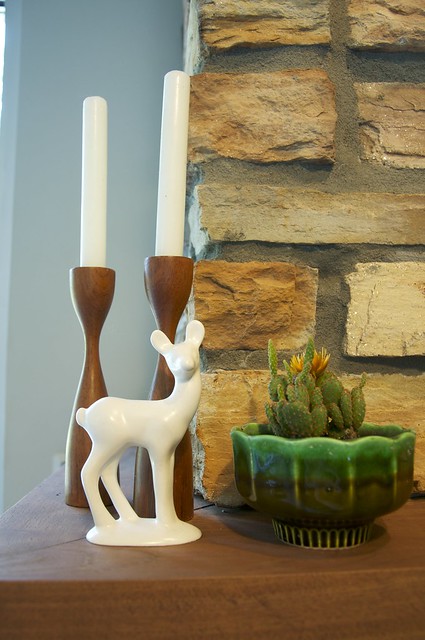
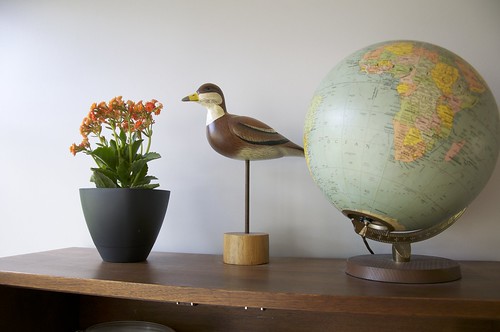
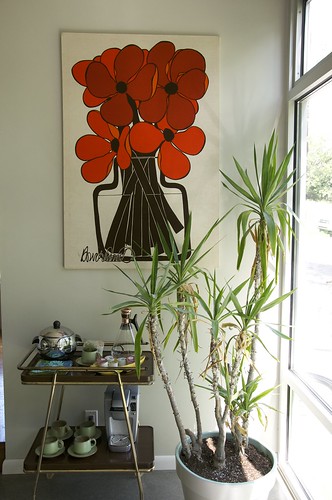
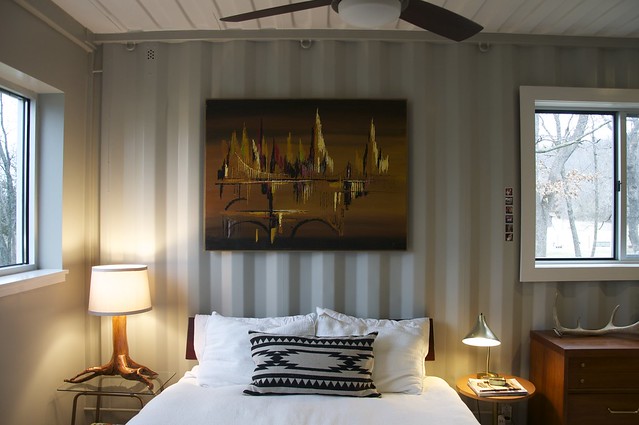
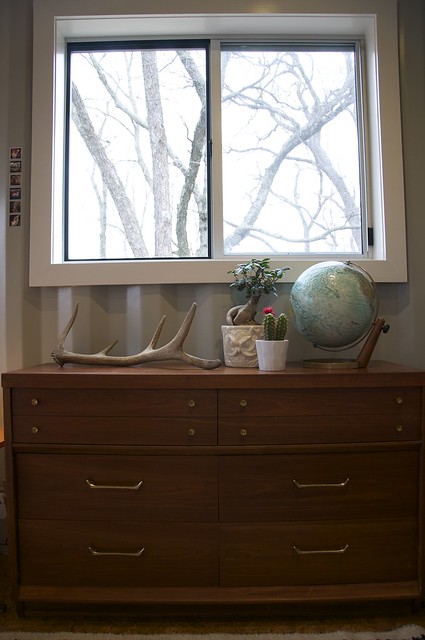
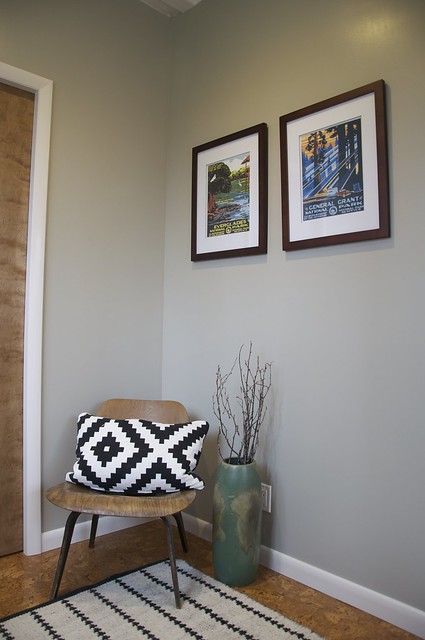
If you can’t tell by now, I like to decorate using lots of vintage pieces, like this $40 estate sale dresser find, and the garage sale globe and planter. Cheap is good.

_DSC5926

Here is another example of how I try to decorate on a budget. Those are calendar prints I just framed, and that awesome Herman Miller chair, Oh I found that in an abandoned trailer. So free is good as well.

_DSC5927

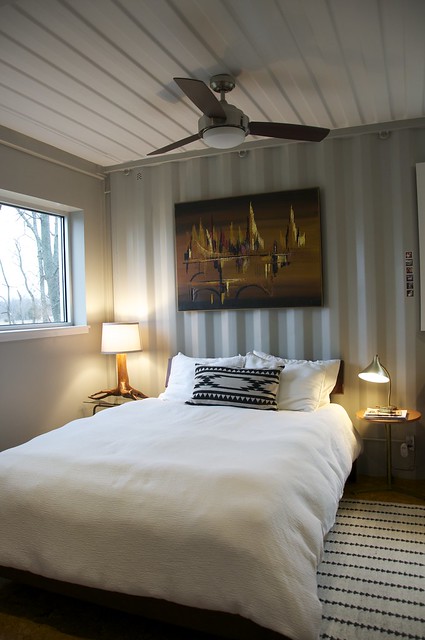
So there you have it, our master bedroom.

I was going to show you the closet and bathroom, but they are a little messy, and I don’t feel like cleaning today :). So we will save that for next time.

House Tour update:

We already did some minor updates around the house, I know crazy, We have only been living in our home for a year, but I can’t ever make my mind up. So here are some of those quick updates.

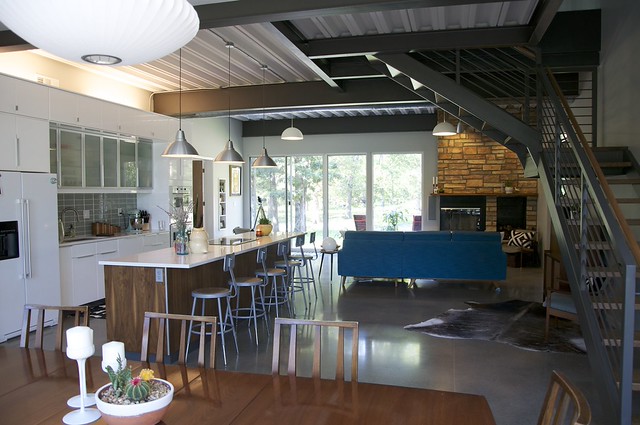
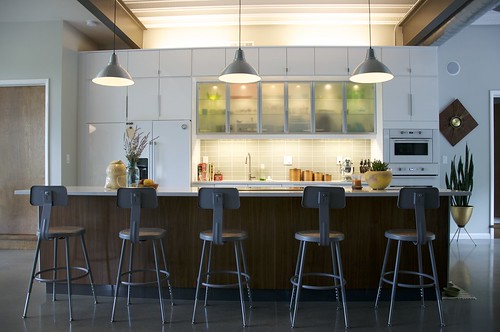
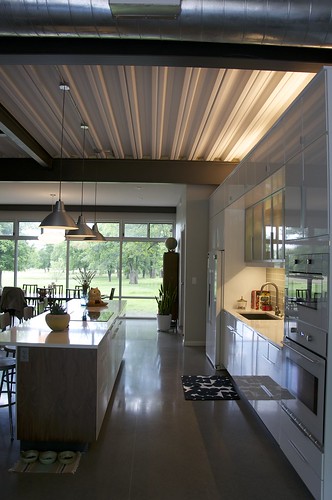
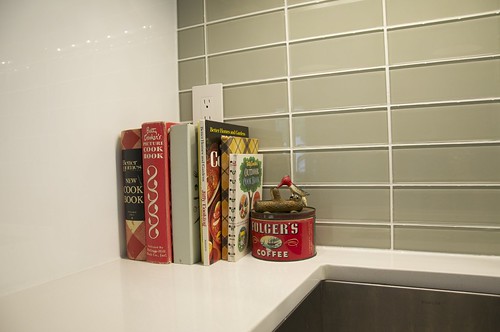
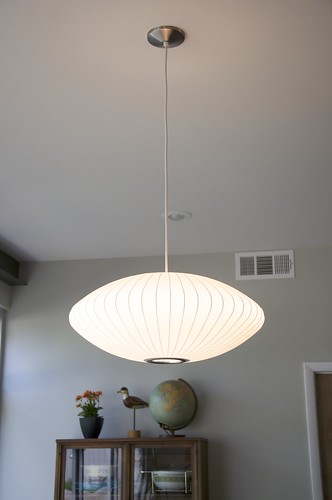
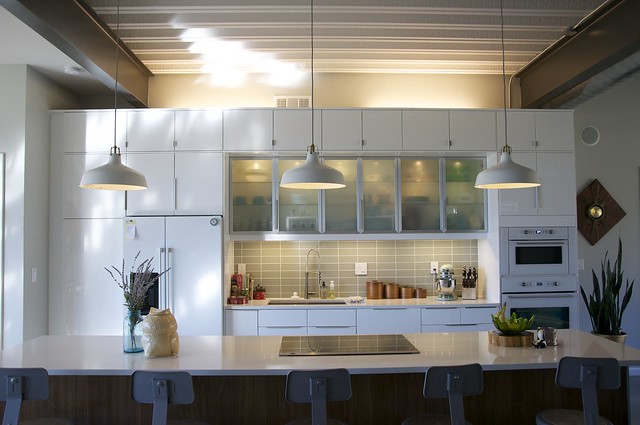
In our kitchen we changed out the pendant lights, to these slightly more sophisticated ones

_DSC5967
Here is a before picture for reference:
_DSC5279

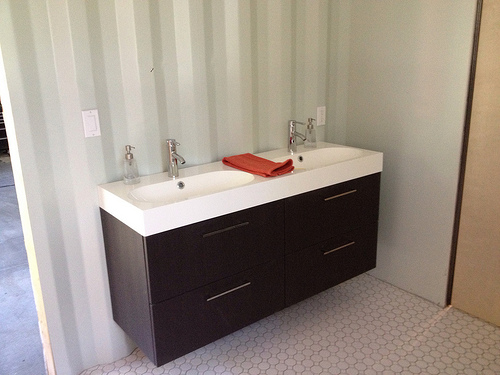
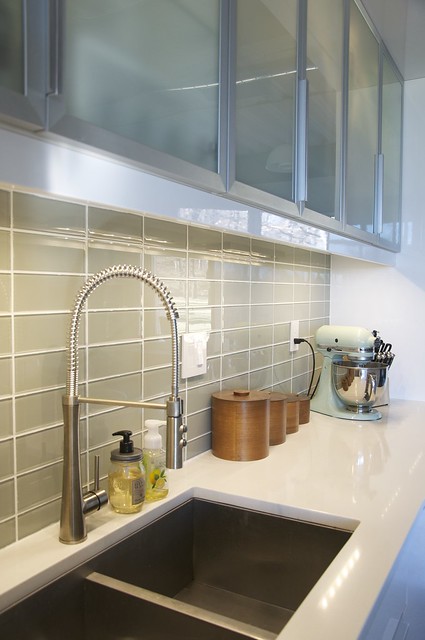
We also upgraded our sink faucet, only due to the fact that our first one already broke, but thank goodness for warranties!

_DSC5971

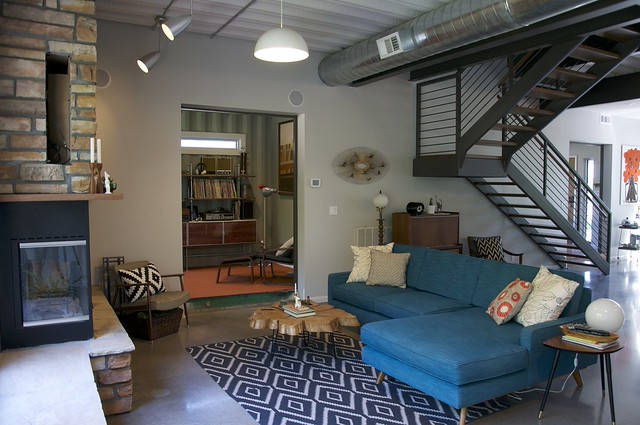
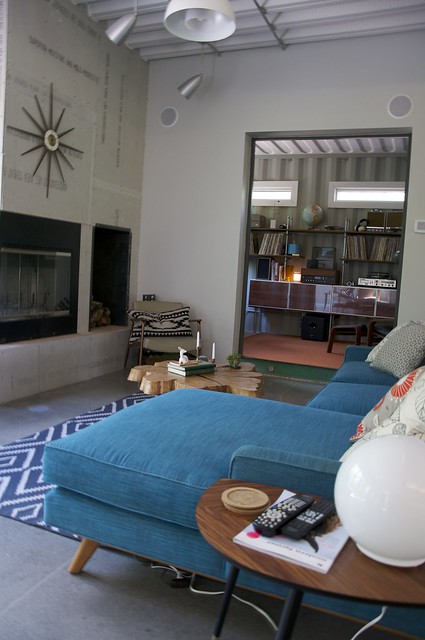
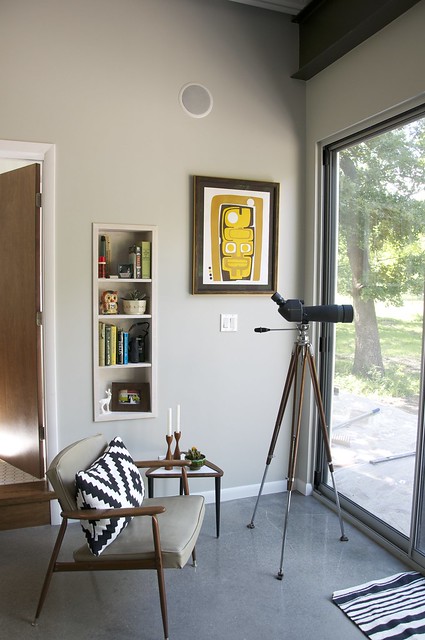
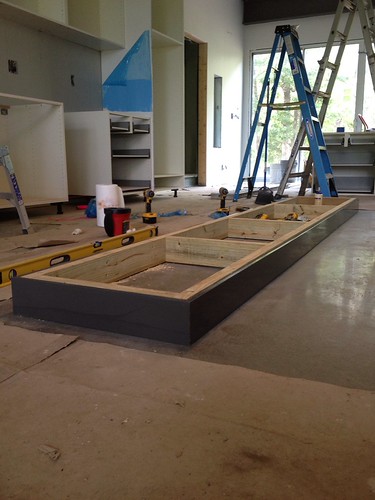
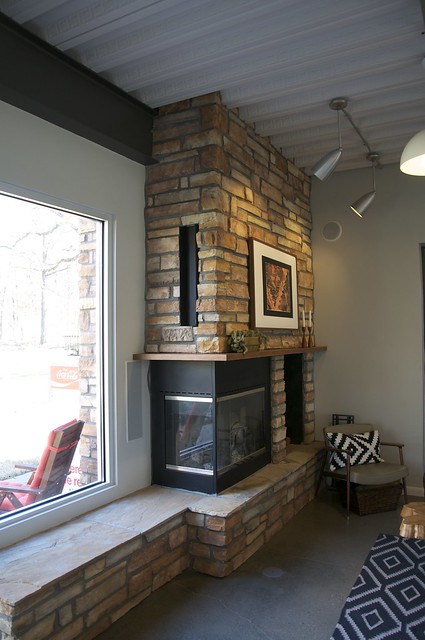
In our living room we completed the TV pull out mount, check this sucker out.

But first, Here is the hole for the TV I showed you last time:
_DSC5436
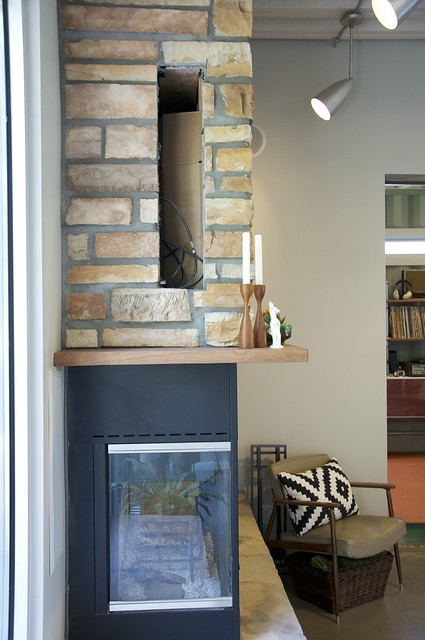
Here is what it looks like now when the TV is put away

_DSC5974 And here it is out

_DSC5979
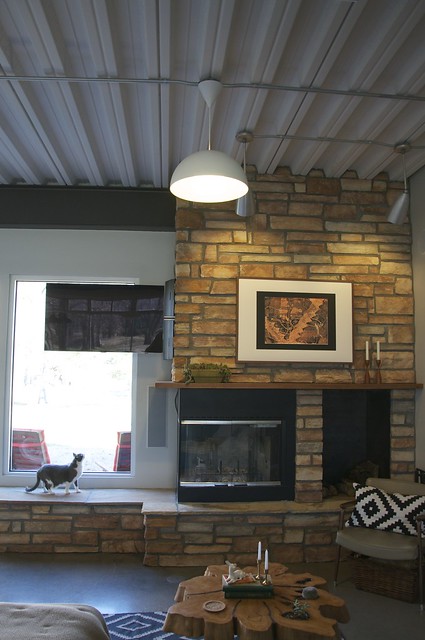
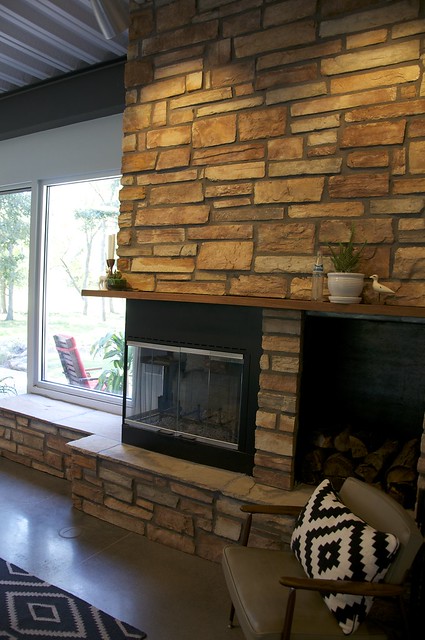
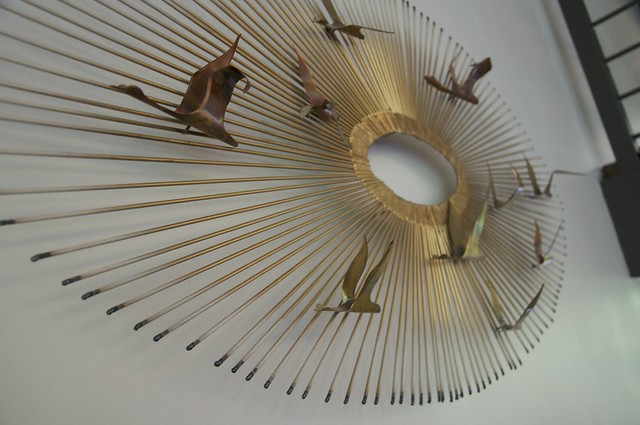
And you might have noticed, I did a little mantle decorating as well.
_DSC5972

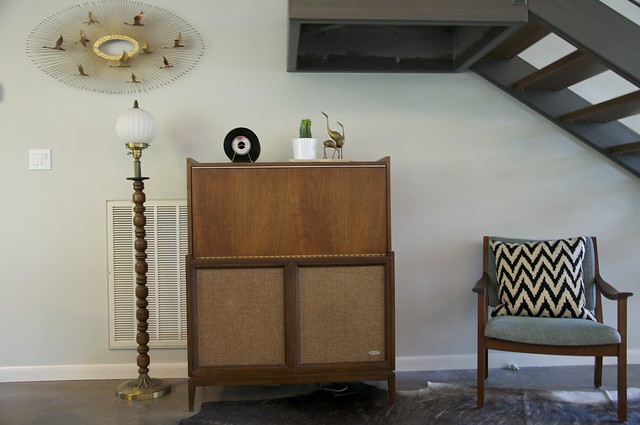
I also did some other minor re-decorating, remember our little nook under the stair landing that looked like this?
_DSC5427
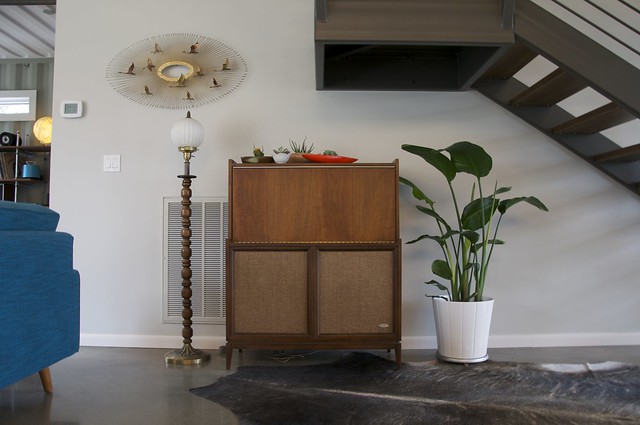
Ya well, I wasn’t satisfied with how that looked, so I pulled out some extra platters and serving dishes that I had and made me a little succulent party. I think it looks much better and brings a little more color to the dark space. Also, we painted the underside of the landing.

_DSC5934

_DSC5936
On a larger scale..

We have completed the vintage steel cabinets in the laundry room! I couldn’t quite capture them in photos today, but I will bring you the completed look soon!

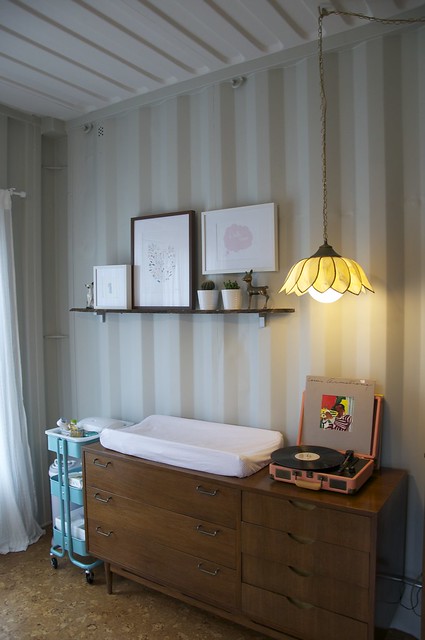
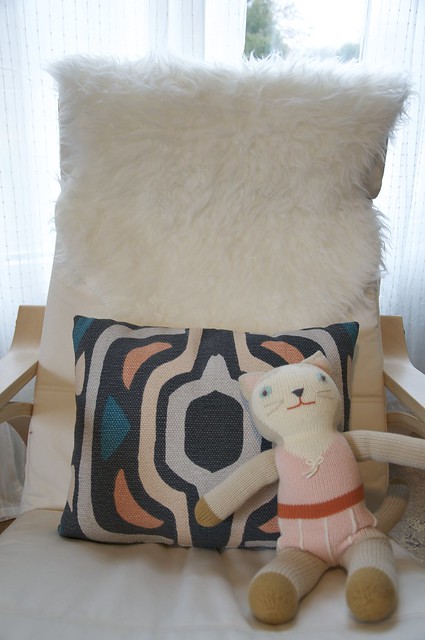
And, just because I love the nursery so much, here is a little peak at Charley’s nursery.

_DSC5958
_DSC5950

So there you have it. Next time I see you I will be holding our new baby girl. Unless I just get antsy and want to add another post before. We shall see.

If We’re at the House Rockin…

Rock.

That’s right. The rock is finished.. it hasn’t taken that much time, just, oh maybe, a  year or two. But we should admit something.. we paid someone to finish.

But shh..don’t tell anyone.

This post naturally flows right into the next part of our house tour. The living room. Since it has had an unfinished fireplace for sometime, and it now sports a nice rock façade.

Just follow me from the kitchen right on into our cozy little living room space.

View 1: coming from the kitchen

(if you notice a cut out in the fireplace, that is where our t.v. will eventually go, so it can be tucked away when not in use.)

_DSC5429

View 2: from the office

_DSC5431

If you haven’t noticed the rock yet.. check it out.
Here is the living room just about a month ago before the rock was finished…

_DSC5309

and now with the rock..

I think its much improved. Now if only it was Christmas so we could hang some stockings up on that mantle.

_DSC5430

Here are a few other shots of the living room..

This is our coffee table, that I “made”, and I say “made” because I didn’t cut the wood or anything, but I debarked it, sanded it, sealed it, and put legs on it.

_DSC5439

_DSC5304

Oh another deer.

_DSC5422

Behind the living room, sort of nestled in under the stairs, is this little nook.. but excuse the under side of the landing, it still needs to be painted, and the small toy mouse I just noticed on the floor.

_DSC5427

Here’s a close up of this score Tyler bought for our 3rd anniversary.

Well done sir.

_DSC5300

Here is one other little “nook” I guess

_DSC5313

And here is one last picture to show the living room in relation to the other rooms you have toured..

_DSC5432

And a little sneak peek at the outside, since it seems like forever since I have posted a picture of the exterior.. it stills needs some power washing however..

_DSC5419

In other news.. Our home was featured in a story by ABC World News, for literally a second, so don’t blink you may miss it. But here’s the clip.

http://abcnews.go.com/WNN/video/steel-house-home-24875347

The Kitchen Tour

And so the tour continues, right on into our kitchen

If you have been following the blog for awhile, you may remember when we brought home our kitchen cabinets in a gigantic U-Haul, (click here), or when we had a kitchen building party, (click here)

Well now come and look at the finished product..

_DSC5279

The high gloss white cabinets you see are from Ikea, and so are most of the appliances. The barstools are from a school supply website, and are actually laboratory stools, they were much more affordable then other barstool options, and fit in perfect with our house.

This picture is a little dark, but I wanted to show where it was in relation to the dining room.
_DSC5278It’s hard to believe that this is the same view from just a little over a year ago. A year and 15 days to be exact.
Untitled

We wrapped the island with walnut plywood and then used Howards Restor-A-Finish to give it is color, and then sealed it. I love two-toned kitchens, with the dark wood and white cabinets, but we couldn’t quite afford walnut cabinets, so this was our solution. It only cost us about $300, but it gave the kitchen a high class look.
_DSC5280Here are just a few other detail shots of the kitchen..
_DSC5285
_DSC5287

_DSC5080

Still to do in this room:

-maybe add a raw edge walnut floating shelf beside the sink

-paint trim

but besides that.. its all finished..

So there you have it.. our kitchen.. Next up, the not so finished living room.

House Tour Continued….

Today’s tour is going to move right along into the mudroom, and then out into our dining room.

But before I begin, I still need to show you the other side of the entryway.

Don’t get too excited, its just our front door and a key holder.
_DSC5231
You can also see the light that Tyler’s Grandpa gave to us. Remember when he surprised us with it here?

And one more shot of the entry- The lighting is bad, but here is what it looks like looking in.

_DSC5232
Moving further into our first container.. behind door number 402.. is the Mudroom

_DSC5059
The mudroom has a ways to go before its complete, but here is a glimpse into where I spend the majority of life, as it would seem.

_DSC5220

The wooden cabinet surround around the washer/dryer was handcrafted by Tyler and Kent this past week,

and remember that sink cabinet (click here)? I spent countless hours sandblasting that sucker. It obviously stills needs its drawers and doors, but we will get to that eventually.

This cabinet is from Ikea, and is wonderful, it is very affordable with lots of storage (which is important when your other cabinets are not installed, or are lacking drawers and doors)

_DSC5222

Here is a close up of that surround Tyler and Kent made.. It not only looks good, but it is functional, it keeps all those loose socks and underwear from falling behind/beside the washer and dryer, and gives me a flat surface for folding laundry.

_DSC5214

 Still to do in the mudroom:

-Finish painting the metal cabinets

-install the upper metal cabinetry and clothes rail

-Touch up paint

-Finish painting window/door trim

-Make some curtains, out of this vintage material:

_DSC5235

Moving right along into our dining room, its just a step away from the entry.

This is the view you see when you are in the entryway.

_DSC5246
The table, chairs and china cabinet were a craigslist find, in need of some TLC. The top of the table at one time had been painted with some kind of thick paint, as well as the top of the china cabinet base.  After lots of paint remover, and scraping I gave up and let a professional finish the staining and sealing.

I tackled the chairs myself, with a little orange glow and some Howard Restore-A-Finish, the wood was looking pretty good. I just needed to reupholster the seat cushions. I chose a black vinyl, for looks, but also for easy clean up for when we have future kiddos. The captain chairs already had a good fabric on the them, I’m hoping original, so I left them be.

_DSC5273
_DSC5276
_DSC5247
The dining room furniture is Broyhill Brasilia, with a date of 1961 on the bottom of the table. I just love the contrast of the dark wood with our light walls. It was a match made in heaven I believe.

Our china cabinet is always filled with vintage goodies, changing with the seasons. Right now it is sporting some nice colorful Pyrex and some fun salt and pepper shakers.

_DSC5268
_DSC5271
_DSC5261
_DSC5265
_DSC5266
On the other side of the room, looking back towards the entryway, you will find a nice coffee bar, a retro wall hanging, and a plant that my family says is at least 30 years old, here’s to hoping I can keep it goin’

_DSC5238

I wanted to show the view from the table, but the lighting makes it difficult to get a good picture, but here is my best shot..

_DSC5252

One last thing I want to showcase, is our George Nelson Bubble Lamp. Isn’t she a Beaut?

_DSC5256

Still to do in the Dining Room:

-Touch up ceiling paint

-Paint door/wall trim

Next stop on the Tour: Our Kitchen.

Oh Hello There.

Well, we still don’t have internet at the house yet.. so I am sneaking this post in real quick at work. Shh..

It is just going to be a short one, sorry no house tour just yet. I just wanted to write a quick post, mainly to show off our adorable new farm dog, named, Kitty.

Kitty is a Anatolian/Pyrenees mix and she is going to be our goat and chicken protector. Well.. that’s our intent. She’s pretty darn cute, so it may be hard for us to make her work instead of being an extra large lap dog.

Here she is bonding with Gertrude..

Untitled

Oh and here’s another adorable photo just because..

Untitled

We are currently working on our goat pen, so hopefully we will have some goats close to the house soon enough..

Oh, and one more thing. We made another, uh.. yea another, trip to Ikea, but this time we put the squareback to work..

Untitled

Untitled

Fingers crossed we get internet this week.. and then Ill start posting some house tour photos!

We Like to Move it Move it.

Welp, we did it.. we moved in, and just in time for Christmas!

This post is coming a bit late, but updating the blog has been difficult, we have no internet at our new home yet, and I have been so busy decorating and putting things away I sort of forgot all about the blog. Whoops.

My plan is to take pictures of every room and do a sort of house tour, as per request, as well as a final list of to-dos. For now I’ll just share a few shots I snapped, while unpacking, of the new place. Hope you like it.

Untitled

Untitled

Untitled

Untitled

Check back for the complete house tour, but also some more diy projects we have completed. Thanks for following! Also, follow me on instagram for more photos of our house and its progress @hannahbright

Quick Update.

Whoa! A new blog post within a week. I know. Crazy.

We (aka Tyler and Kent) just recently finished our kitchen backsplash. And surprisingly enough, we had no major issues. After many months of looking at different tile options, I finally decided on a simple grey 3×8 glass subway tile. To keep with our simple/modern design we decided to lay them in a vertical pattern, as opposed to a brick pattern.  Take a look..

Untitled

Untitled

Still to do in the kitchen: Add a floating walnut shelf to the right of the sink, and put walnut plywood around the front and sides of the island.

Sneak Peak at what’s happenin’ now:

One word. Tile.

Tile. Tile. Tile.

That about sums up this entire post, need I say more?

Well, I guess I’ll have to explain a few details about why tiling in a container can pose some minor struggles. Numero Uno: Corrugated walls. Since the walls in the bathroom are corrugated (layman term: wavy), the floor tile had to be cut to fit. I chose a mosaic type tile, with small pieces, bringing us to struggle dos: Tile cutting. Have you ever tried cutting small, I mean really small tile? I haven’t either, I left that up to the boys. But I hear its a beast.

Check it: Look at those curves.
Untitled

After the floor was finished we decided to install our vanities. Main reason being that the countertop installers needed my makeup vanity in place to measure for the countertop. Which brings us to struggle number 3: corrugated walls. <– this being a common theme in our house. Steve, (code name for countertop man) measured and used a laser to determine the shape of our countertop. The result, was surprisingly better than expected.

Here is the finished makeup vanity: (don’t worry about those loose cords just yet)

Brightcontainerhouse

Here is a close up of the cut countertop (sorry its a little dark and blurry)
Untitled

Here is the double vanity on the other side:

Brightcontainerhouse

Shower tile was the next step. Just thinking about it makes me want to cringe. Struggle number 4: chipping/breaking tile.

I chose large 12×24 tiles for the shower walls, which I thought would make the tiling process quicker, due to their larger size. I think this actually made it more difficult. The reason being: cuts. Cutouts needed to be made for all the plumbing. Which meant, round cuts within the large tiles, sometimes on the edges. This resulted in lots of broken tiles. It eventually worked out. (Our shower will thank us later with its double body sprayers and rain shower head)-after 21 days of curing.

Here are those cuts I was talking about.

Brightcontainerhouse

but look at the final product…

Bright container house

Bright container house

And since your all wondering about the toilet… Here it is.

Untitled

its a dual flush system to try and counteract the wasted water from the shower. (It just makes us feel better about ourselves)

Untitled

Still to do in the master bath: Paint and install trim, Install a thermostat for the in-floor heating, install frameless shower door and standout mirrors. Take a shower.

Happening now: Cork Tile. Posing similar problems. including corrugation, and uneven tiles. More on that later.

In other news: We stepped away from the grout floats to take our squareback to one of our favorite shows in Eureka Springs. Heres some pictures of the trip.

Untitled

Untitled

Untitled

Untitled

Untitled

Kitchen Aid

Just recently some family came over and helped us at the Bright Container House with various projects. Some did some cleaning, some hung a massive beam, and others helped assemble our kitchen. So a big thanks is in order for those who came out, alright here we go.. Thank you, mom, dad, Kent, Sheilah, Dalton, Jesse, Candace, Kevin, Lee, Darcey, Jake, and Aunt Kathy.

Here is a rundown of what has been happening lately at the house. We have most of the kitchen assembled, minus a few doors, and the walnut around the island. We hung some lights, some of which work, and some of which we can’t figure out what’s going on. (Hey.. don’t judge, we aren’t electricians). We painted a few more rooms, and we returned to Ikea for a few more items for closets and some returns.

The first item on the agenda for our family work day was to get the massive, dog-poop smelling (literally) beam out of the house and installed in our entryway.

This is where the beam was attached

Untitled

A little measuring and a lot of discussion

Untitled

And now its time to place it..

Untitled

It is now in place and out of the way of our kitchen..

Untitled

Meanwhile inside the house, after some minor cleaning- window washing and vacuuming, it was time to start putting our kitchen cabinets together. We had lots of help..

Untitled

The Cabinets are pretty easy to assemble, just add some screws and some wooden pegs, slap some wood glue on there and then fit them together. Here is the glue slapping and the piecing together part.

Untitled

Untitled

After these steps, you then nail the back onto them. Lesson learned (Don’t hand me a hammer and expect things to be pretty)…and this is not just me, but I won’t name the others :). I did however get better after the 10th or 11th cabinet.

To attach the upper cabinets to the wall a rail had to first be put in place. The cabinets then hang on the rail. For the base cabinets against the wall a ledger board was installed and legs were attached.

How many men does it take to assemble legs? In this case.. Three.

Bright container house

The first cabinets going up..

Bright container house

Some discussion time. Something is not fitting right. (Long story short: These cabinets had to be removed and modified)

Bright container house

Kitchen progress..

Untitled

The next step was to make a base for the island cabinets to attach to and to install the toe kicks.

Untitled

Here is the completed base with our high gloss grey toe kicks

Untitled

Placing the island cabinets..

Untitled

Finished with that part.

Untitled

We also installed some more of our lighting and hooked up more outlets. Here are some of our vintage lighting we used in the house.

This light I found at a flea market for a whole $5 is now hanging in my laundry room.

Untitled

And remember this one from Grandpa Charley? This one is now hanging in our entryway

Untitled

We are currently working on the flooring in the bottom two containers, and still doing some work in the kitchen. We have purchased our countertops and are awaiting there arrival, unfortunately it will probably be 4-5 weeks until they are installed.

And as always…Thanks for checking it out!

Paint The World

Its been awhile since the last update.. so there is a lot to catch up on. Since the last update there has been some painting, some assembling, lots of drywall, a little flooring and some more painting. (Be prepared it may be a little wordy, but Ill add lots of pictures for those of you like me)

The drywall in the house is now complete. We went with a smooth finish as opposed to texture to keep with our sleek modern look. And of course, like most of our decisions, we chose the one that is the most difficult. Since every ding will show, we had to be extra careful not to hit the wall and always keep some mud handy.

The next step was to paint, we chose a light grey for the main walls, and a dark grey for the beams (which we recently re-painted since the first color choice was no bueno.) We are happy with our choices… for nowPaint choices have by far been the hardest decisions for me, and after re-painting our front door and the interior beams, I  feel a little like I am fullfilling Sherwin Williams motto: Paint the World. Oh by the way, we have to re-paint both our front door and storage room door. (FYI: don’t just use the sample paint you get from Sherwin Williams, it wont hold up.. Yay for round 3 of painting our door!)

Here is the final drywall before we sprayed the primer. Notice the darker beams, as opposed to the not so eye-pleasing greenish beams below. We are much happier with the darker beam choice. (Also, check out the exposed duct work)

Untitled

The beam color before we came to our decorating senses.

Untitled

We decided to spray the walls to save some time, but since we did go with a smooth finish we had to back roll during the process to prevent a rough texture from emerging. Here is Kent and Tyler doing just that:

Bright container house

Lots of painting has been going on, so Tyler and I’s “date nights”  now are spent working on the house. Here is us after our date night theme “Dinner and a little role play” (Alien vs. Predator style)

Untitled

We also accomplished some of the prep work for our flooring in our bottom two containers. In the entryway, laundry and utility room container we poured a self leveling concrete floor and in our master bedroom/closet we layed 3/4th inch recycled plywood. In the master bath we installed in-floor electric heating and then poured self leveling concrete to prepare for the tile. Our bathroom also has a few more updates, including: durarock installation in the shower surround, and the plumbing for our shower head and sprayers. Our tub was also put in place upstairs.

Before (entryway/laundry/utility room)

Untitled

Here is Tyler pouring the self-leveling concrete.

Bright container house

While Kent and I (mainly Kent) mixed it up. (sorry about the picture, it was dark outside.)

Bright container house

The finish product, it is now ready for cork.

Bright container house

This is the master bedroom and closet floor before the plywood.

Bright container house

Tyler cutting the plywood

Bright container house

Here is the dirty plywood floor (Since it was re-used), Tyler’s mom recently cleaned it for us, so it is almost ready for cork.

Untitled

Here is the shower plumbling: There are two body sprayers, a shower head, and a rain shower in our master shower.

Untitled

The durarock in the shower

Untitled
In-floor heating being installed

Bright container house

Bright container house

Bright container house

Bathtub upstairs

Untitled
hmm.. lets see.. what else has been done..

Oh! Exciting news… I assembled our Ikea patio furniture over the weekend, and it looks great. Now we have a spot to eat when we are working on the house, instead of using un-ordinary things for our chair and tables, like a paint bucket and a step ladder.

Bright container house

Can’t wait till we live here so we can enjoy this deck.

Bright container house

The deck is still not complete, we have purchased our railing and should be starting on that soon.

Now some decorating decisions! Check out our bathroom tile..

The pebble tile will be the floor tile in our shower, and the larger light grey tile will be our wall tile in our shower and around the stall area. The glass tile is our accent tile, and the dark grey is our main floor tile.

Bright container house

Im sure there are other updates I am forgetting about, but the next time I have time to post again I’ll add them in. As for the next post.. it should hopefully include: bathroom tile, kitchen install, and lighting.

Sneak Peak:

Bright container house